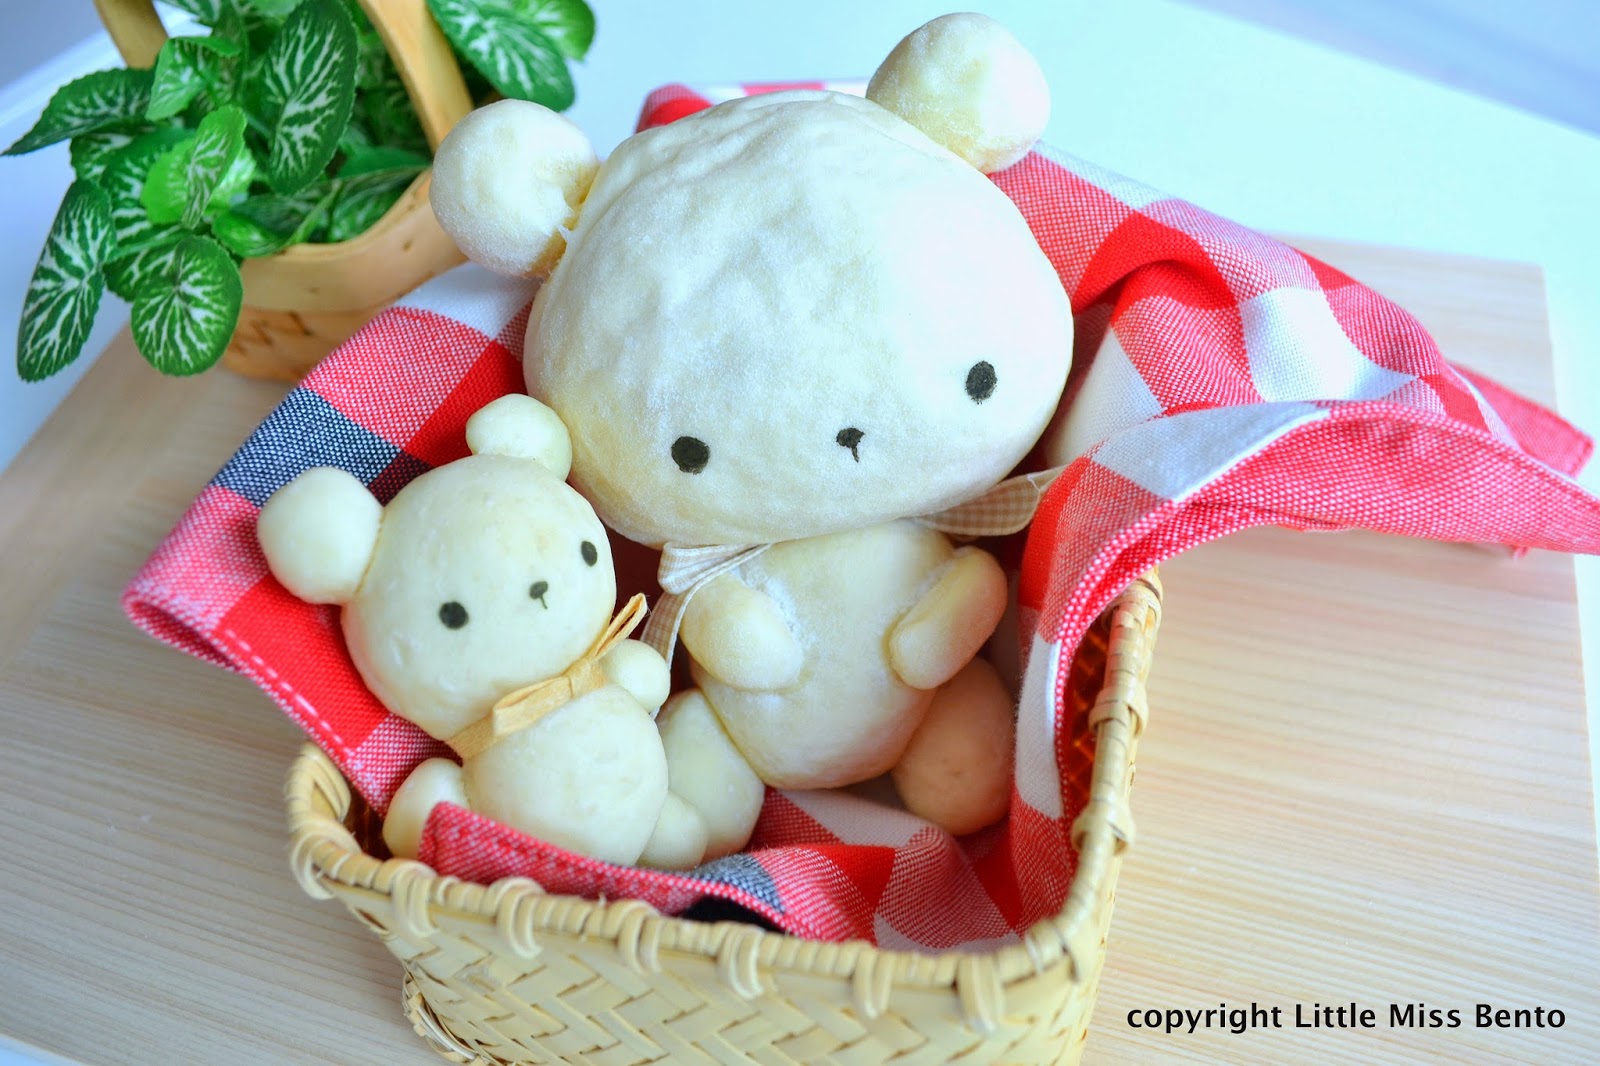
Teddy Bear Bread Bento today! Baked these cute teddy bears yesterday and packed them into my bento.Â
Â
Super fun and easy!! Packed everything together in 10 mins with the washing, cutting and preparation of the fruits and vegetables.Â
Â
The sides were blanched Romanian broccoli, cucumber, carrots, flower made from egg sheet, mini mandarin oranges, yogurt served with fresh strawberries.Â
Â
I also brought along some Japanese blueberries mashed fruit jam that I recently got at the new Isetan outlet at Westgate, super yummy! This was to go along with my teddy bread buns.Â
Â
The mashed fruit jam was really yummy! Very fruity! It is not watery like jam and you really do taste the fruit.Â
Some of you who are following me on Facebook and Instagram will probably know this was coming, since I could resist sharing the photo and video of the teddy bear bread I baked. And as promised, below is the recipe and the step by step pictorial guide.
Â
The ingredients for the bread dough is the same as the bear bread buns I made earlier. Except that this time I added an extra ‘secret’ ingredient called Joshinko (上新粉) to ensure that the bear stays white even when baked.Â
Â
Want to know what it is? Check out the recipe below!
TEDDY BEAR BREAD RECIPE
(Makes 3 to 4 bears, depending on the size you make them)Â
In my case, I made 3 larger and 1 smaller teddy bears. If you prefer, you can adjust to make 4 equal size teddy bears instead.
Ingredients
260g bread flour
1 tbsp sugar
1 tsp salt
5g unsalted butter
1tsp instant yeast
150~160ml water
approx 1.5 tbsp joshinko (Very fine rice flour, in kanji it is written as 上新粉)
*I hope you will be able to get joshinko where you live, if not please substitute it with any other finely milled rice flour.Â
(Japanese)
ææ–™
ï¼’ï¼–ï¼ï½‡ã€€å¼·åŠ›ç²‰
大ã•ã˜1 ç ‚ç³–
1å°ã•ã˜ å¡©
5g 無塩ãƒã‚¿ãƒ¼
1å°ã•ã˜ã€€ã‚¤ãƒ³ã‚¹ã‚¿ãƒ³ãƒˆã‚¤ãƒ¼ã‚¹ãƒˆ
15ï¼ã€œï¼‘ï¼–ï¼ï½ï½Œã€€æ°´
上新粉
Method
1. Sieve the bread flour into a large mixing bowl. Add sugar, salt, butter, yeast and water. Mix well. The dough will slowly form. Initially it looks like huge chunks and rather flakey.Â
2. Place the mixture on a worktop and knead well for about 12 mins or until the surface is smooth. The dough at this point does not stick to your hands.
3. Shape it into a smooth ball of dough and set it in a large mixing bowl for the first rise. At room temperature, it will take about 55mins to 65mins.Â
4. After the first rise, the dough will double in size. Do the finger test to ensure that the dough is ready.Â
5. Dust your fist with some bread flour and punch out the arm. Then scoop the dough on to your worktop again.Â
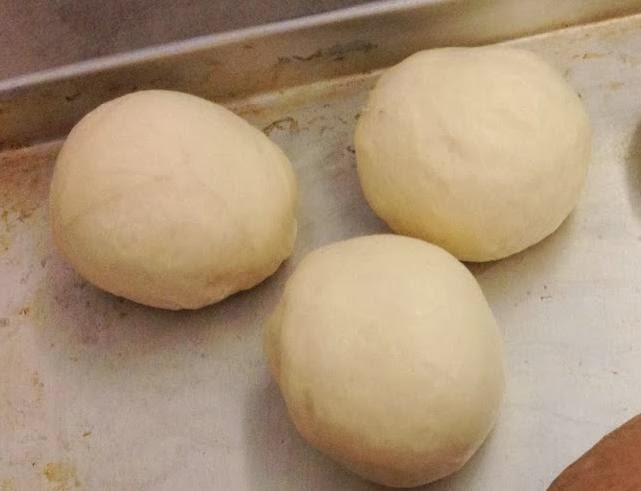
6. Divide the dough into 3~4parts (depending on how many bears you want to make) . Roll them out and smooth into small bread buns. Cover with a wet lint free towel. Set aside for the second rise (10mins)
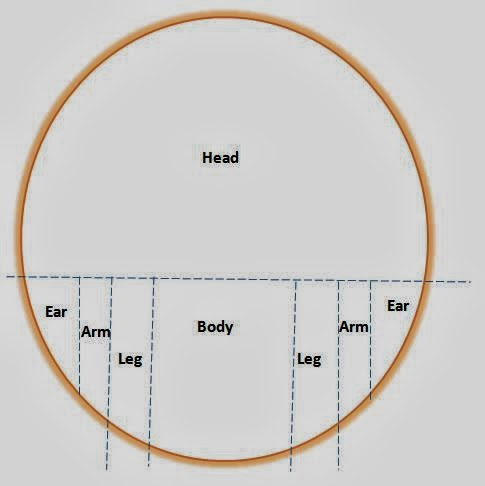
7. After the second rise, roll out the bread buns. Divide into parts. Shape the bread buns into the bears. Cover with damp lint-free cloth and set aside for third rise (at least 10mins, if you have time, 20mins)
Â
Remember that the bears need to have space around them on the baking tray as they will expand further after the 3rd rise and also while baking.
Preheat your oven to 170 C.
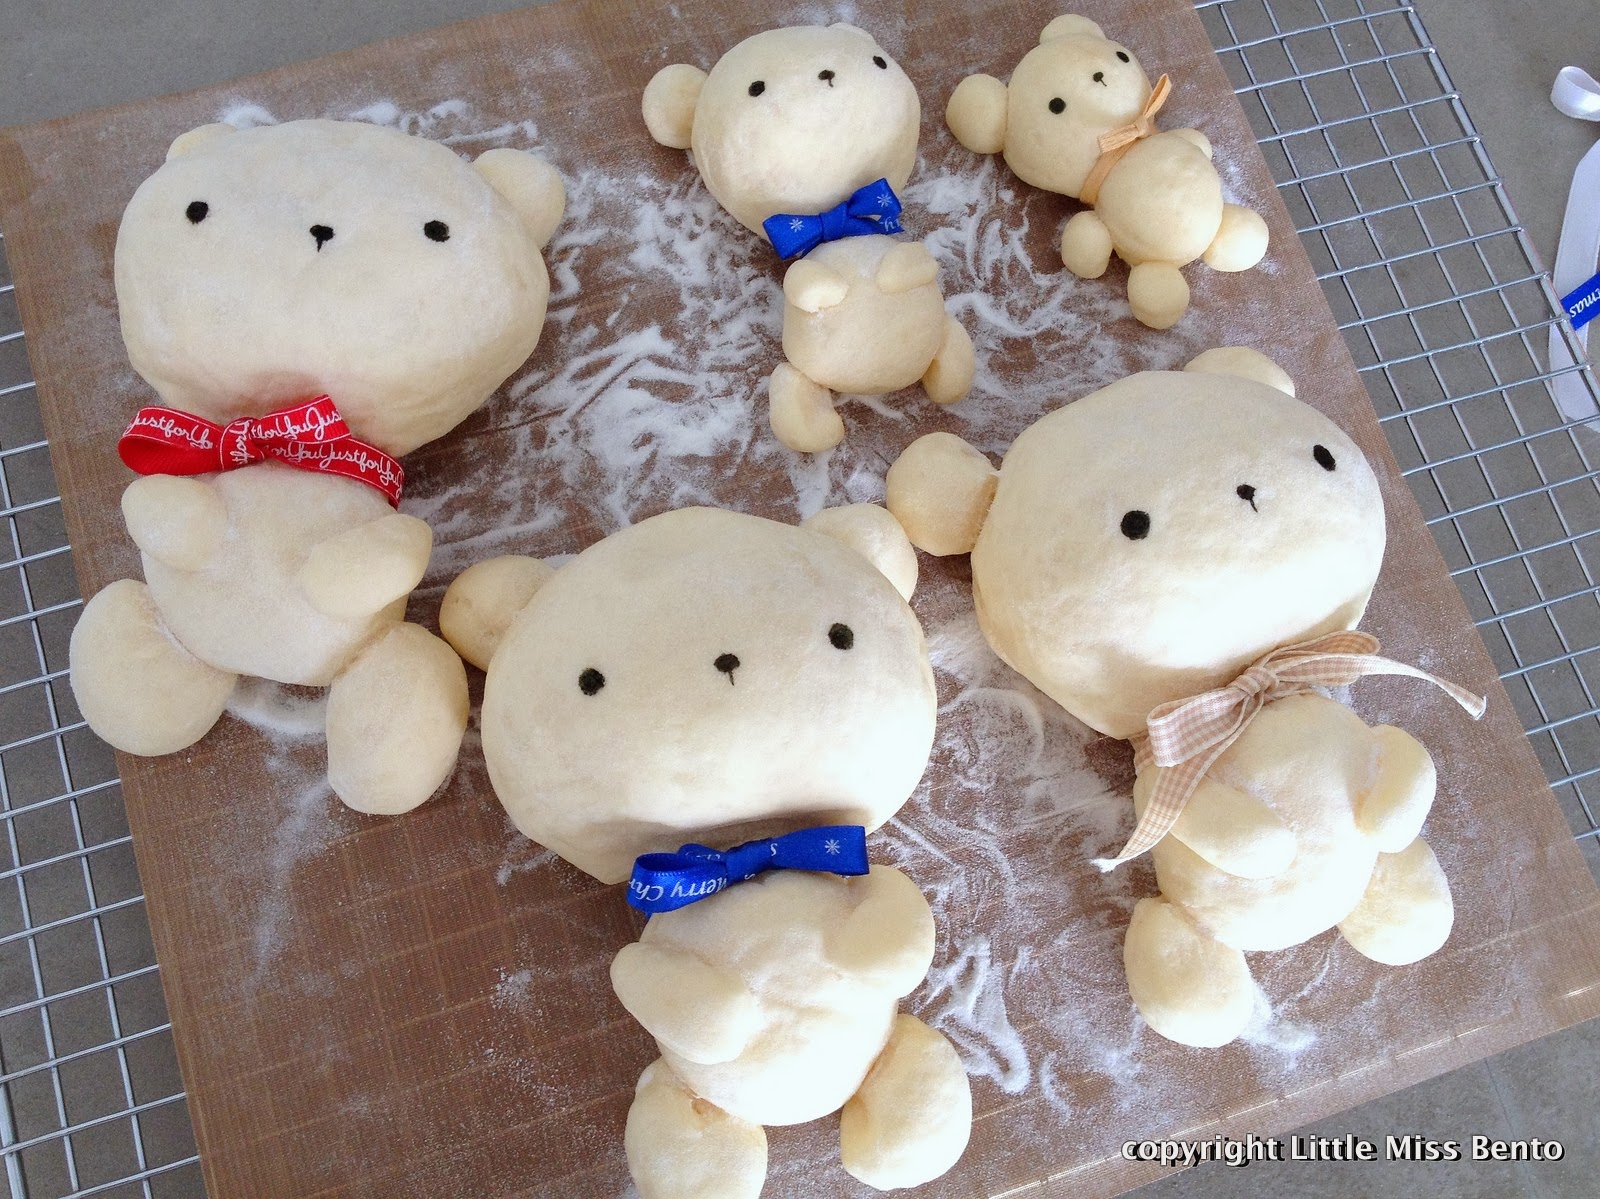
8. After the 3rd rise, just before baking, dust some joshinko flour (fine rice flour) on the bread buns. (see picture below). This is important as it prevents the bear from having brown patches when baked.Â
Tip: If you would also like to tie a ribbon around the teddy, please ensure space at the neck area. This means that the bear arms cannot be too high and near the neck. Please click to view the enlarged image below for reference.Â
Bake the bread buns for about 12~15mins at 170 C.
9. After the bread is baked, use a cooking brush and gently brush away all the the excess rice flour on the teddy bear bread. This will also make it easier to draw on the features under step 10.
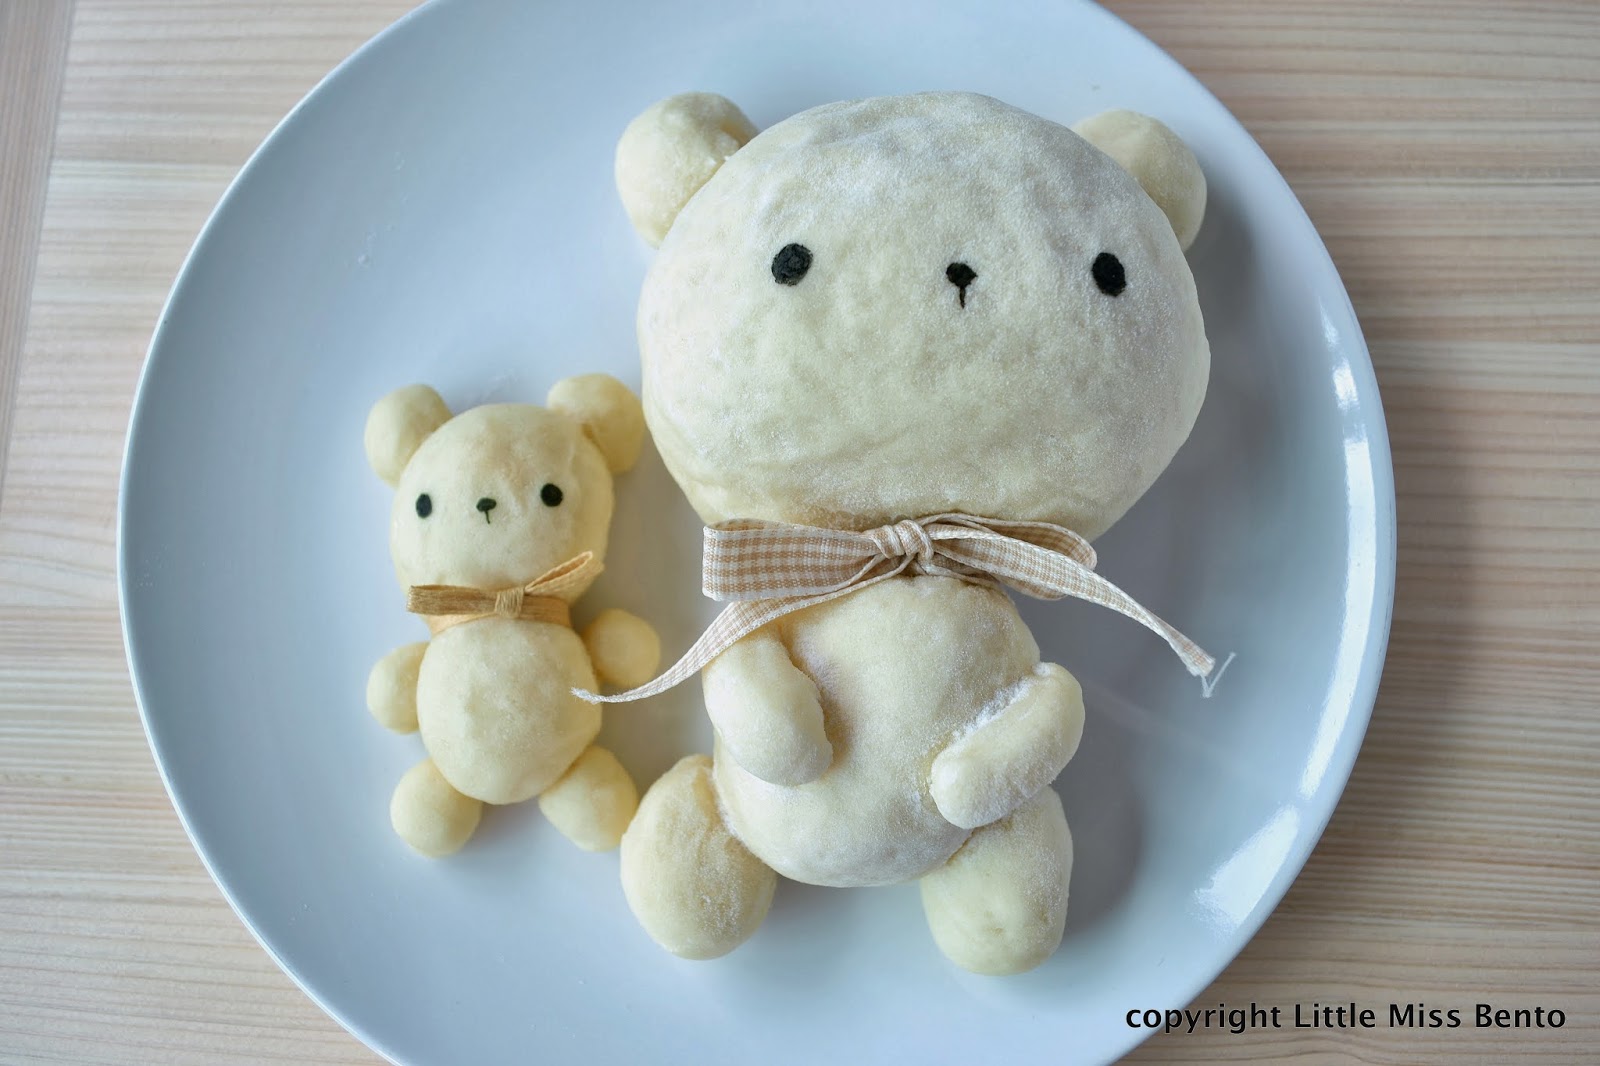
10. Using edible food marker, I drew on the eyes and nose for the teddy bear character. Alternatively, you can also use chocolate pen or seaweed.
I also tied thin ribbons around the bears, I think it makes them very cute :)
Follow my food art and bento creations on Facebook, LIKE my page here. :)
ã‚ャラå¼ãƒ©ãƒ³ã‚ング
ブãƒã‚°ã®ãƒ©ãƒ³ã‚ングã«å‚åŠ ä¸ã€‚よã‚ã—ã‘ã‚Œã°ã‚¯ãƒªãƒƒã‚¯ã—ã¦ãã ã•ã„ã♪ ã‚ã‚ŠãŒã¨ã†
Please support my blog ranking! Please just click the button below as the clicks will go towards the ranking! Thank you so much
↓ ↓ ↓ ↓ ↓ ↓ ↓  ↓  ↓


June 12, 2014
oh my I love the little bear! Thanks for your recipe too, did you use regular flour or rice flour for bear? Gonna have to try this one
June 13, 2014
For the bread dough, bread flour is used. Before baking, please see step 8 where you can dust on some rice flour (this actually helps to keep the bear white) :)
Cheers! Happy you like this. Enjoy the bread with your favorite sides, jams or spreads :D yummm
March 15, 2014
谢谢你的好食谱,我做了8个迷你熊,虽然我的手工一般,但是出来的结果是眼睛还没画上就被抢光光了,😄😄真的很好吃哦。谢谢你。
March 15, 2014
Hello Evelyn, 謝謝你!我好開心!是孩子們吃了嗎?哈哈~~可愛啦!我其實還有一點擔心,因為麵包不是很甜,不知大家是否喜歡!謝謝你的留言!
March 21, 2014
不客气!对啊,都是孩子们在吃。我做了两次,so far 没有 complaint, 他们还一直要求再做给他们吃呢。
March 22, 2014
謝謝你!那我安心了,哈哈~~我本身喜歡和果醬一起吃!嘻嘻!再次的謝謝你!
March 23, 2014
嘿嘿。。说谢谢的应该是我啊!😘😘😘
December 31, 2013
So adorable!
December 31, 2013
Heheh thank you! I love the bear buns too!
December 23, 2013
Love this! Nice touch to tie ribbons around them, they look so cute!
December 31, 2013
Heheh thank you! I love how the ribbons look on them too! ;)
December 23, 2013
Toooooo cute!!
December 23, 2013
Thank you!! :)
December 23, 2013
Shirley谢谢你的无私分享,你的白熊熊真的太讨喜!!好想为孩子做一个^_^
December 23, 2013
你的手這麼巧,一定難不倒你的!謝謝!!!