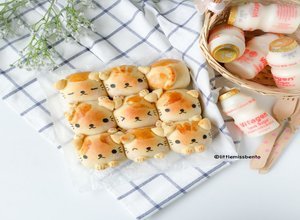
Inspired by a cute bread I spotted on my Pinterest, I baked a ring of teddy bread buns. This round arrangement is so cute right? Great for some of you who own a chiffon cake maker with a removable base.Â
I hope you will enjoy this idea of the bread bun arrangement.Â
I do not own a chiffon tray so I ended up placing a small metal cup in the middle of my round cake tin. :P Works just as well too, except that it is harder to get the bread out of the tin. So I will recommend using a baking tin that has a removable base if you have one.Â
Below are the recipe and photo tutorial.Â
As the bread dough base is not sweet, I would highly recommend not to omit the chocolate chips on the recipe, and wrapping them inside your bread bun before baking. If not, please serve the bread with jam/honey/chocolate spread.Â
Have fun!! This recipe is similar to my earlier teddy bear bread recipe, if you need some pictorial guide for the initial steps, you can take a look here for some guidance.
Ingredients
- Bread Flour 250g
- Cocoa 8g
- Warm water (35C) 150 ml
- Butter 10g
- Instant yeast 1.5 tsp
- Sugar 1 tbsp
- Salt 1/2 tsp
- Chocolate chips 30g~50g
7. After the second rise, roll out the bread buns. Divide out and shape the the ears and arms. To the remaining larger portion of the dough, wrap the chocolate chips and smooth into a round bun. This is for the teddy’s head.Â
 8. Arrange them in your baking tin and set aside for 3rd rise (about 15~20mins). Preheat your oven to 170C.
Don’t worry if the bread buns look a little small and have gaps between one another. It will rise further for the 3rd rise and also during baking.Â



February 12, 2014
Hi do i add cocoa powder at start into the flour mixture? cos i cant rly find when to add in =/
February 13, 2014
Ah really sorry, you are right. I missed that out. You should it at the start. I will amend the post!
January 16, 2014
This is adorable, and such a great idea!
February 13, 2014
Thank you so much!!!
January 16, 2014
I saw something similar on Pinterest too n saved it as my to do list. Urs is super awesome, as usual!
February 13, 2014
:) thank you!
January 16, 2014
太可爱了!!你好棒!
我好想跟它们围在一起说悄悄话^_^
January 16, 2014
哈哈哈哈。。它們圍在一起的樣子真的好搞笑。嘻嘻。謝謝您!
January 16, 2014
so sweet!
January 16, 2014
Aww thank you so much!
January 16, 2014
This comment has been removed by the author.
January 16, 2014
Soooo cute!
January 16, 2014
hehheh thank you so much!!