 Since it is Valentines Day today, I prepared something special for you.
If you follow my Instagram, you will know that I have been cooking while resting at home this period.
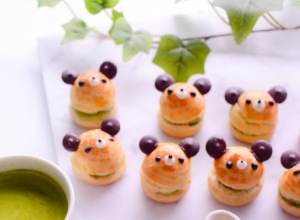
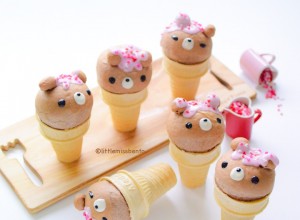
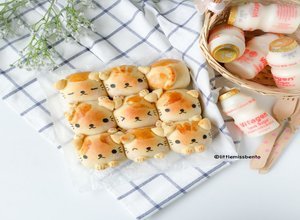
Today I baked some really cute Bunny & Bear Pull Apart bread.
I have been very inspired by the recent trend in Japan, to make pull apart breads and have baked quite a number since last year. One person whom I admire a lot is @umi0407, Umi san makes super cute pull apart breads and has been a great inspiration.
I hope you like this recipe for the Bunny & Bear Pull Apart Bread. the portion as been sized down quite a bit as this time I didn’t want to bake a huge quantity and wanted it more petit. There were also no filling inside the bread, please feel free to adapt the recipe to suit your preference.
Bunny & Bear Pull Apart Bread
- 110g bread flour (divided into 55g and 55g)
- 3 tsp sugar
- 2/3 tsp instant dry yeast
- 75ml warm milk (warm to about 35-39C)
- 6g unsalted butter
- 1/4 tsp salt
- 0.5 tsp cocoa powder
- pink food colouring
For deco
- edible food marker pen
- deep fried thin pasta sticks
1. In a bowl add in 55g bread flour, sugar, instant dry yeast and pour in warm milk. Use a wooden spatula and mix quickly and vigorously to activate the yeast. Tip: You will observe tiny bubbles popping in the mixture – this is a sign that the yeast has been activated.
2. Add in the remaining bread flour of 55g, butter and salt. Mix until almost all the dough comes clean off the sides of the bowl.
3. Using the scrapper, transfer the dough on top your worktop and scrap any remaining dough/flour off the sides of the bowl too.
4. Using the lower part of your palm, knead the dough until about 80%. 80% stage is when the dough is no longer sticky and fairly elastic but the surface is not totally smooth yet.
5. Divide the dough about 95g and 110g. Continue kneading the larger dough until smooth, shape into a bowl and transfer into a bowl. Cover with cling wrap and let it ferment for about 40mins or until increases in size to 1.5 to 2 times.
6. To the remaining smaller dough. Add in sieved cocoa powder and knead until the cocoa is evenly incorporated into the dough to colour it light brown. Similarly, shape into a bowl and transfer into a bowl. Cover with cling wrap and let it ferment for about 40mins or until increases in size to 1.5 to 2 times.
7. During the fermentation, grease the chiffon tin with butter. Set aside.
8. After 1st fermentation has completed, do the finger test to check the fermentation. if all is okay, degas the dough and using a digital weighing scale, measure the parts of Bunny and Bear:
White dough (bunny) *approx
Makes 3 sets
- Head 13-14g
- Body 16g
- Arms/legs 1g
- Ears 1.5-2g
- Important!! The ears for bunny were baked separately on a baking sheet. I later on assemble the ears using deep fried pasta sticks
- Important!! You will have some extra white dough left, please set aside for Step 10.
Brown dough (bear) *approx
Makes 3 sets
- Head 13-14g
- Body 16g
- Arms/Legs/ears 1g
9. Arrange the dough on the chiffon tin base. Use a toothpick to gently poke the edges of the smaller parts (e.g. ears, arms, legs). This helps to prevent them from falling off later during the baking process.

10. To the remaining white dough, add a little pink icing colour and knead until evenly coloured. Divide into 3 parts and shape into mini heart shapes. Assemble on the bears.
11. Cover and let it rest for final fermentation. It should take 25-30mins.
12. Preheat oven to 180C. Lower the heat to 140C and bake the bunny ears for about 7mins. Bake the pull apart bread at 140C for 22 mins.
13. Using deep fried thin pasta sticks (I use angel hair pasta), attach the bunny ears on to the bunnies. Using food maker pens, complete the Bunny & Bear Pull Apart Bread by drawing on the eyes and mouth.


February 23, 2016
Thank you so much for the recipe and process! I was wondering if you just bake the bread on the inner chiffon pan and put it in the oven? Did you use a heart-shaped pan?
March 23, 2016
Yes i did! wow your eyes are sharp. Actually a round shaped pan would be better. But I only have the heart shape chiffon pan. haha