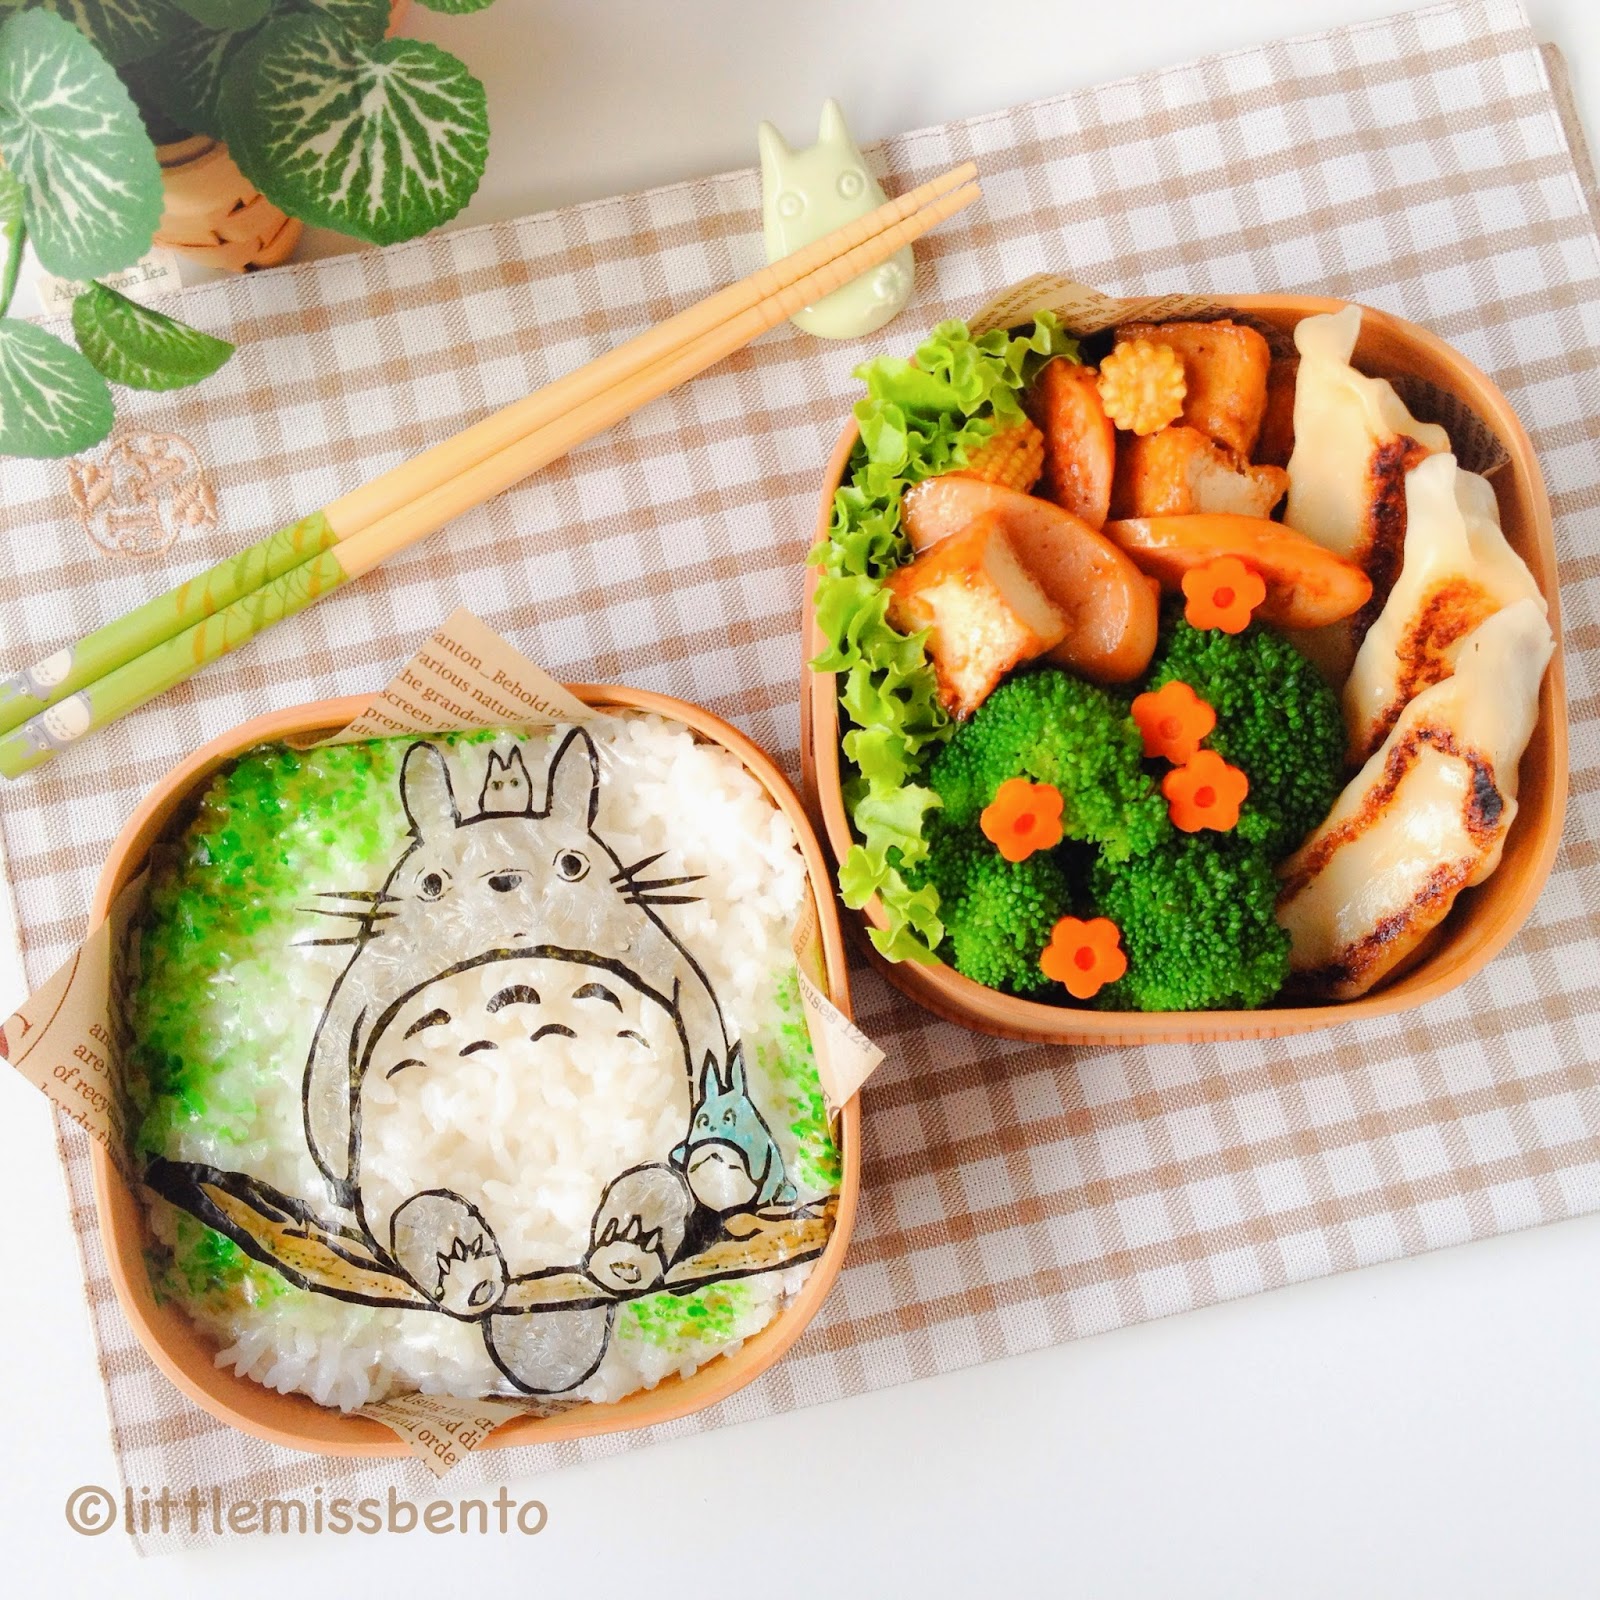
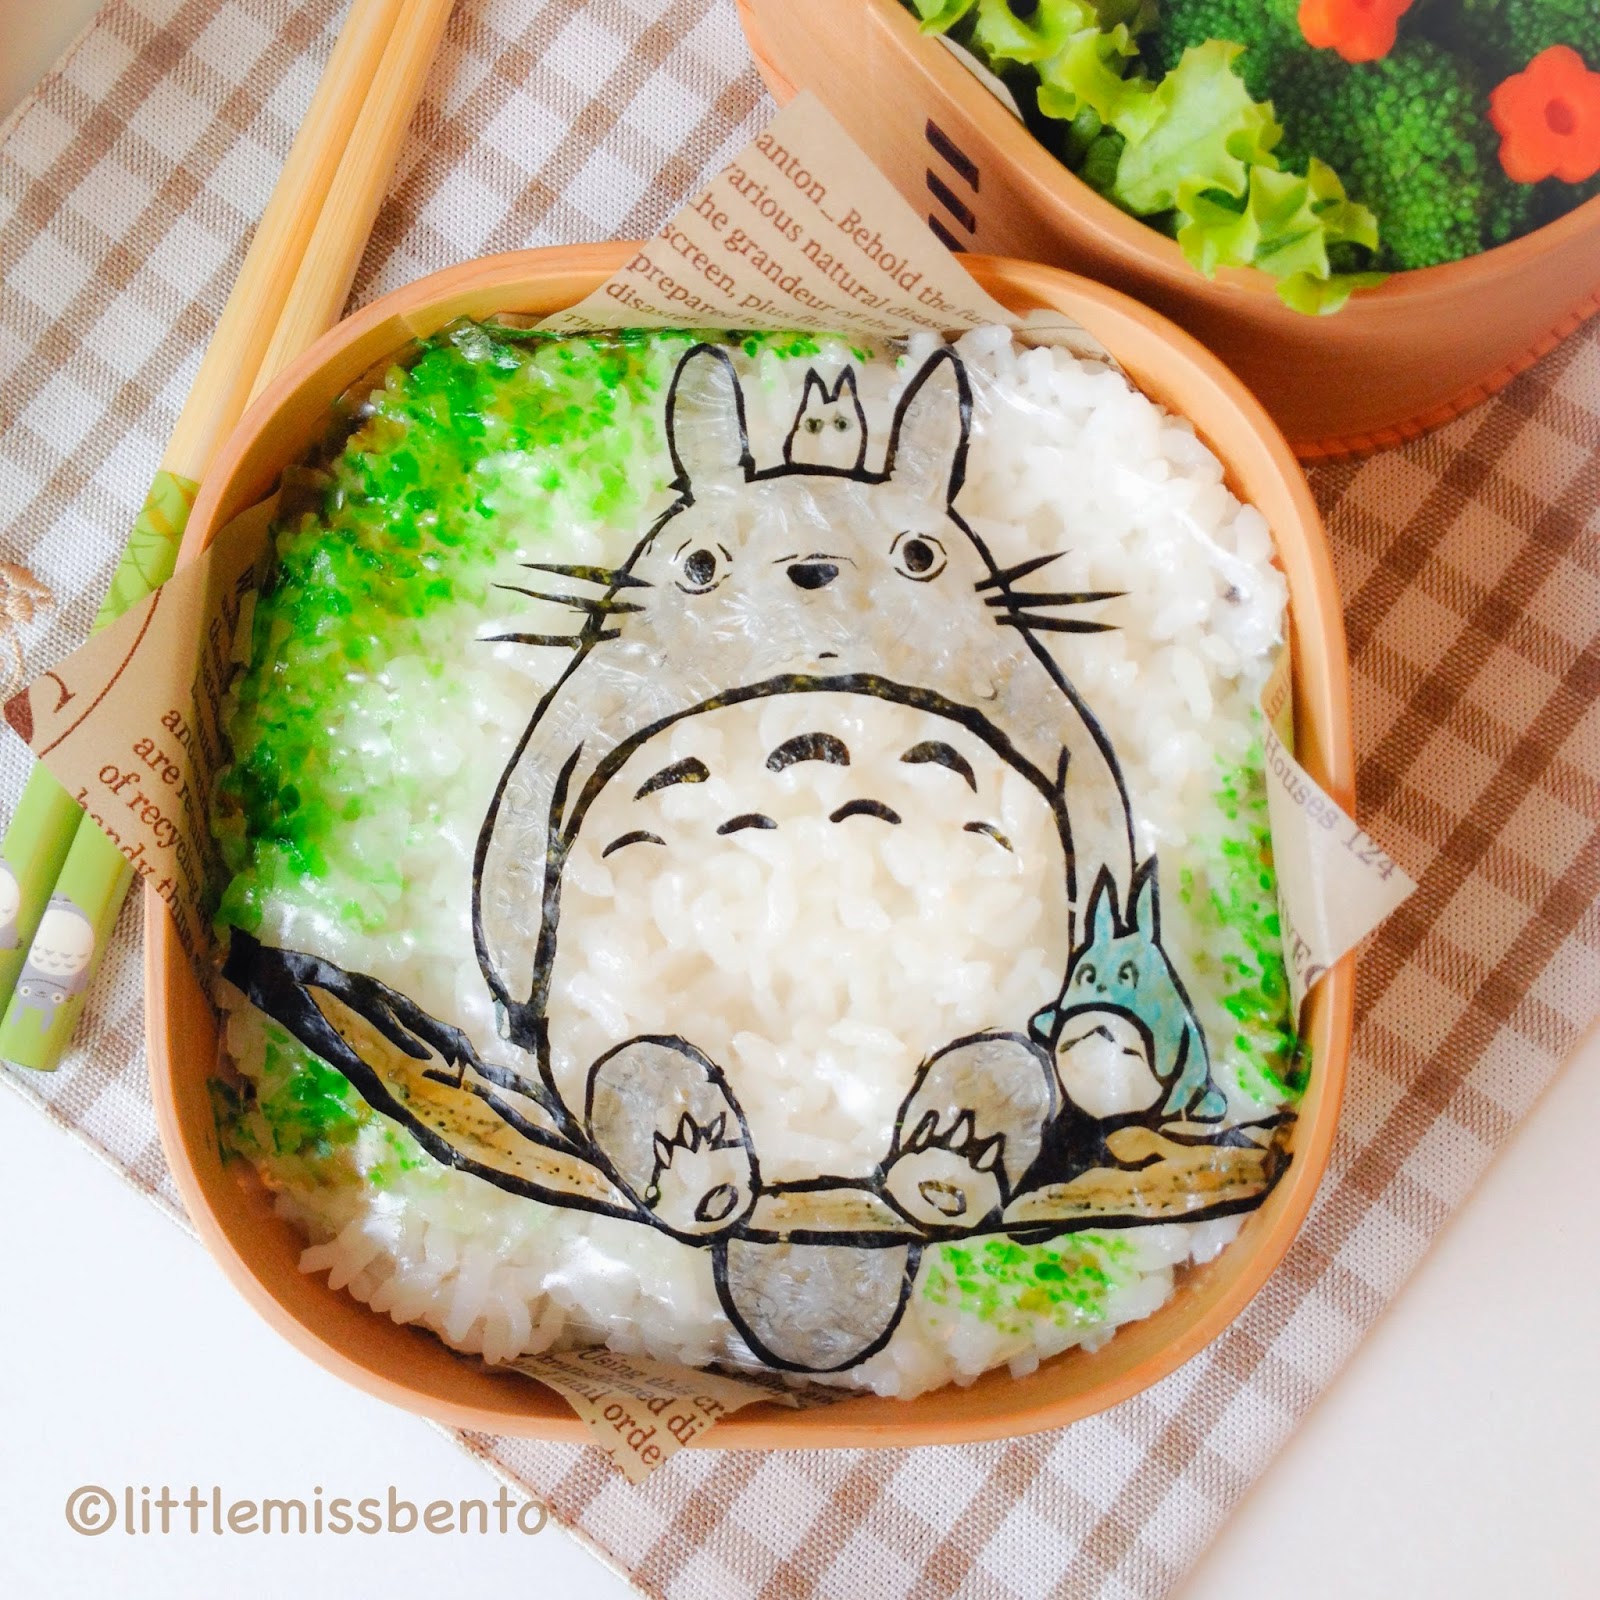
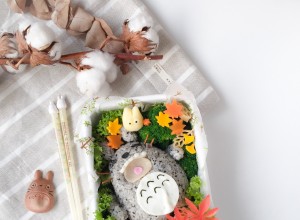
A Totoro Seaweed Art Bento! Do you like my seaweed cutting today?
I realised I have never attempted a Totoro seaweed cutting amongst my seaweed cutting creations. The design that I picked is definitely one of the tougher ones for seaweed cutting as well.Â
Overall, I think it turned out pretty nice! Happy~~
The side dishes were Japanese gyoza, sauteed sausages with baby corn and tofu squares, broccoli, carrot and lettuce.Â
I have included in today’s bento post, a step by step guide for the seaweed cutting, as well as assembling the seaweed outlines onto the oblate sheet, added colors and adding it to the rice.Â
Please note that some food colors are used at the second phase. If this is not ideal for you, you could keep the design just black and white.Â
Tutorial guide for Totoro Seaweed Cutting for Bento
Level: Intermediate Advanced
Time: estimated 1.5hours (may vary depending on how fast you can cut the seaweed design)
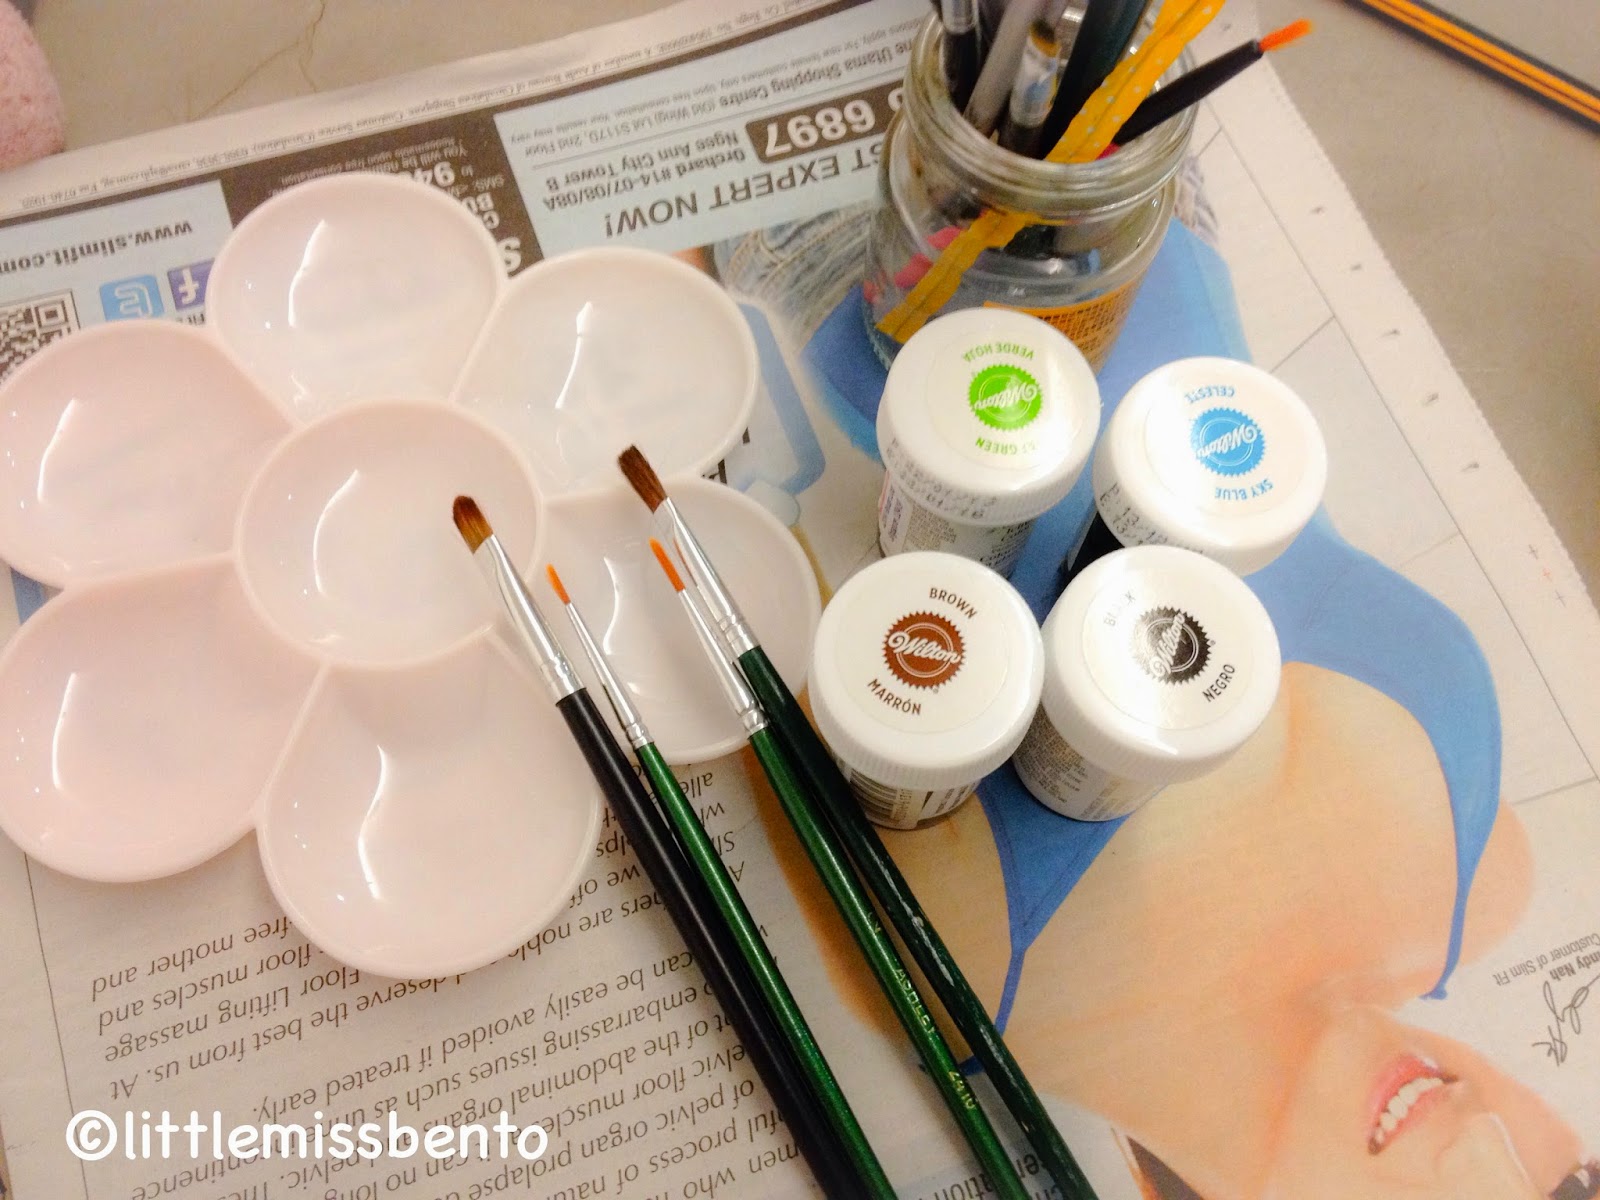
Ingredients/Tools needed
- 1 large seaweed sheet
- 1 oblate sheet (oblate sheet is edible sheet, transparent, thin and tasteless. It is used for sweets decoration, link to the product at Amazon JP at the bottom of this post)
- 2 print outs of the totoro design
- sharp paper cutting knife (I used my ACTO knife)
- cutting board
- some clips
- small brushes
- icing colors (green, brown, black, blue)
- water
- tweezer
- lint free cloth
- edible black pen (extra fine)
Method
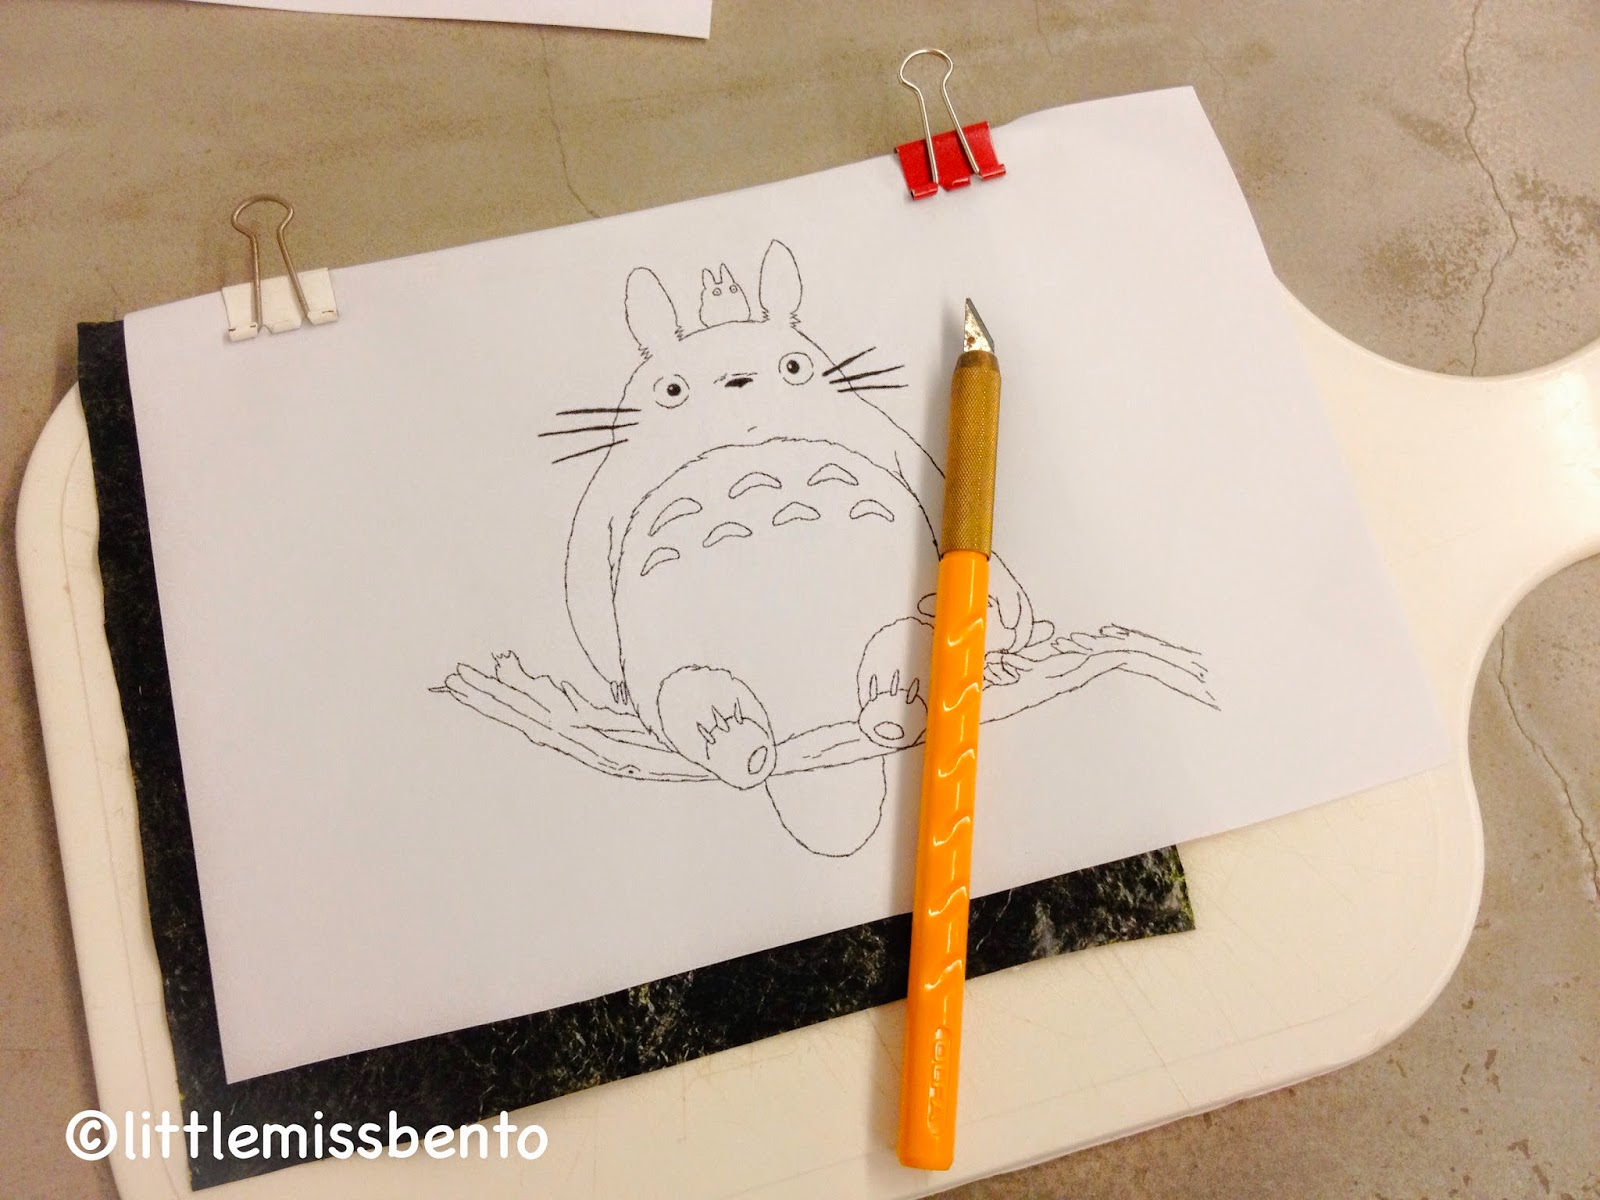
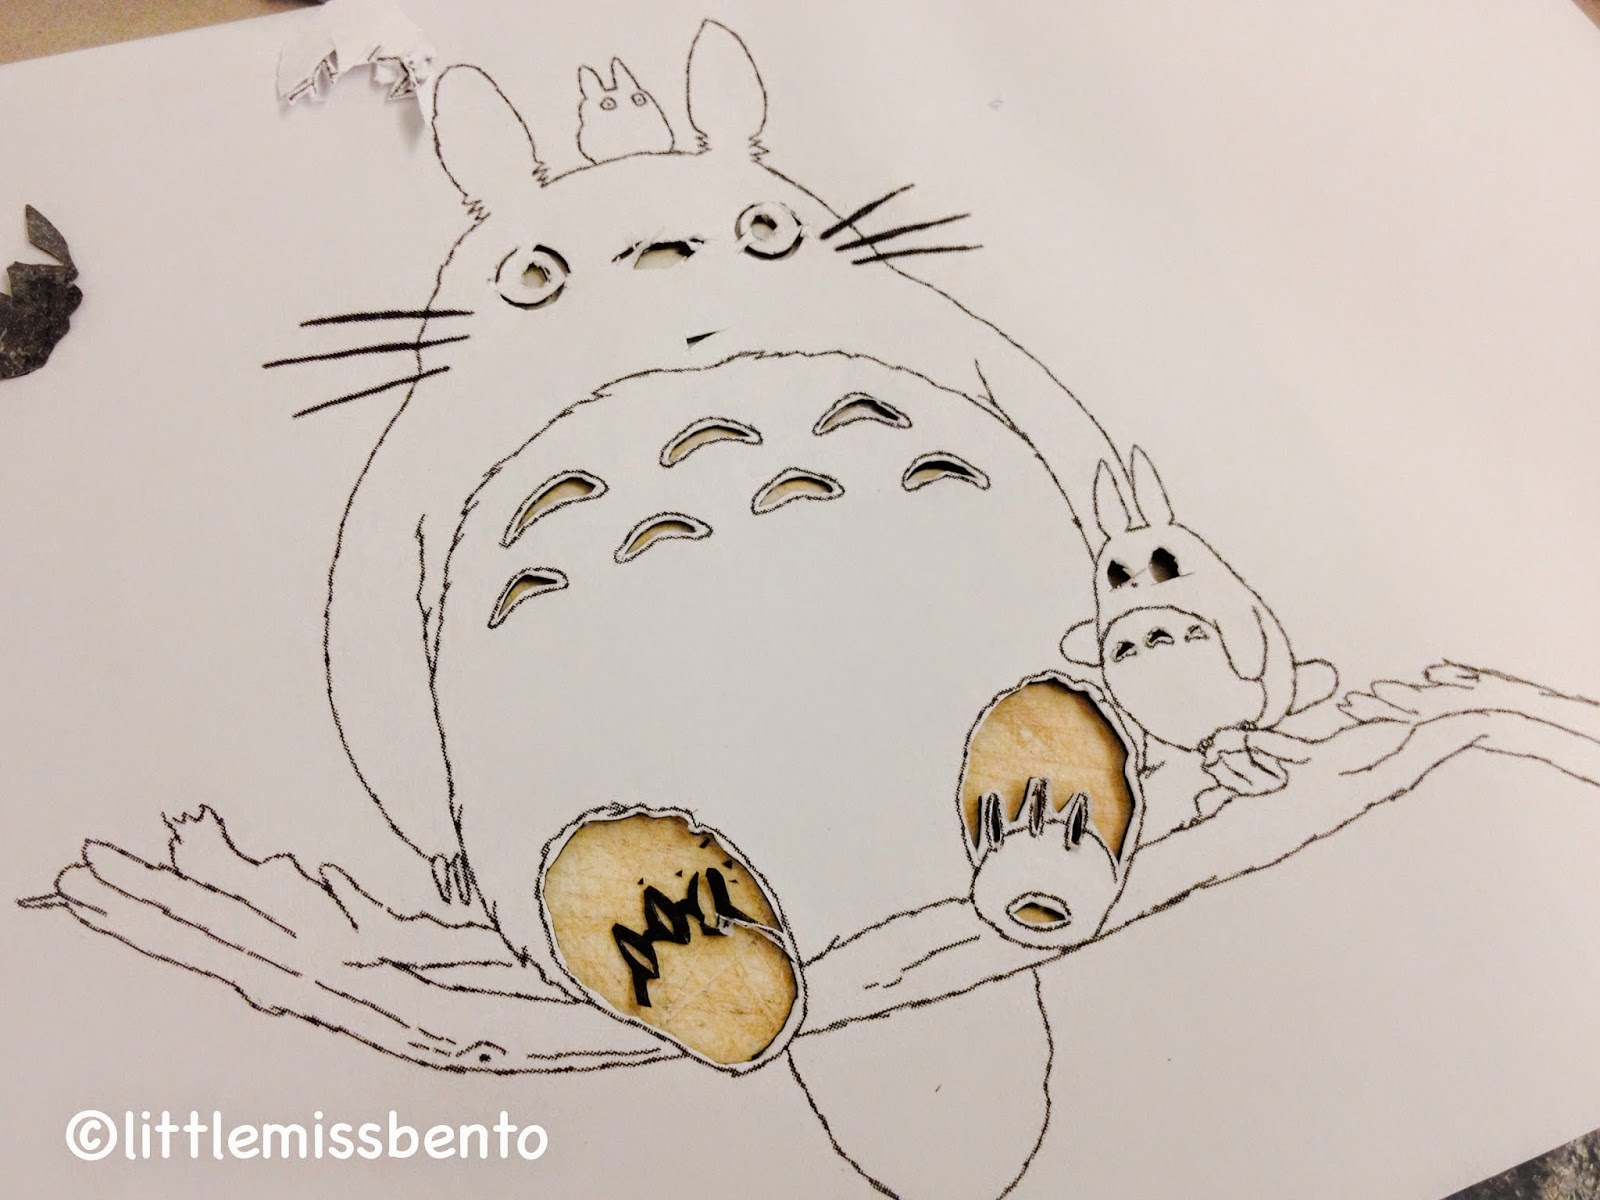
1) Clip 1 print out design over the seaweed sheet on the cutting board.
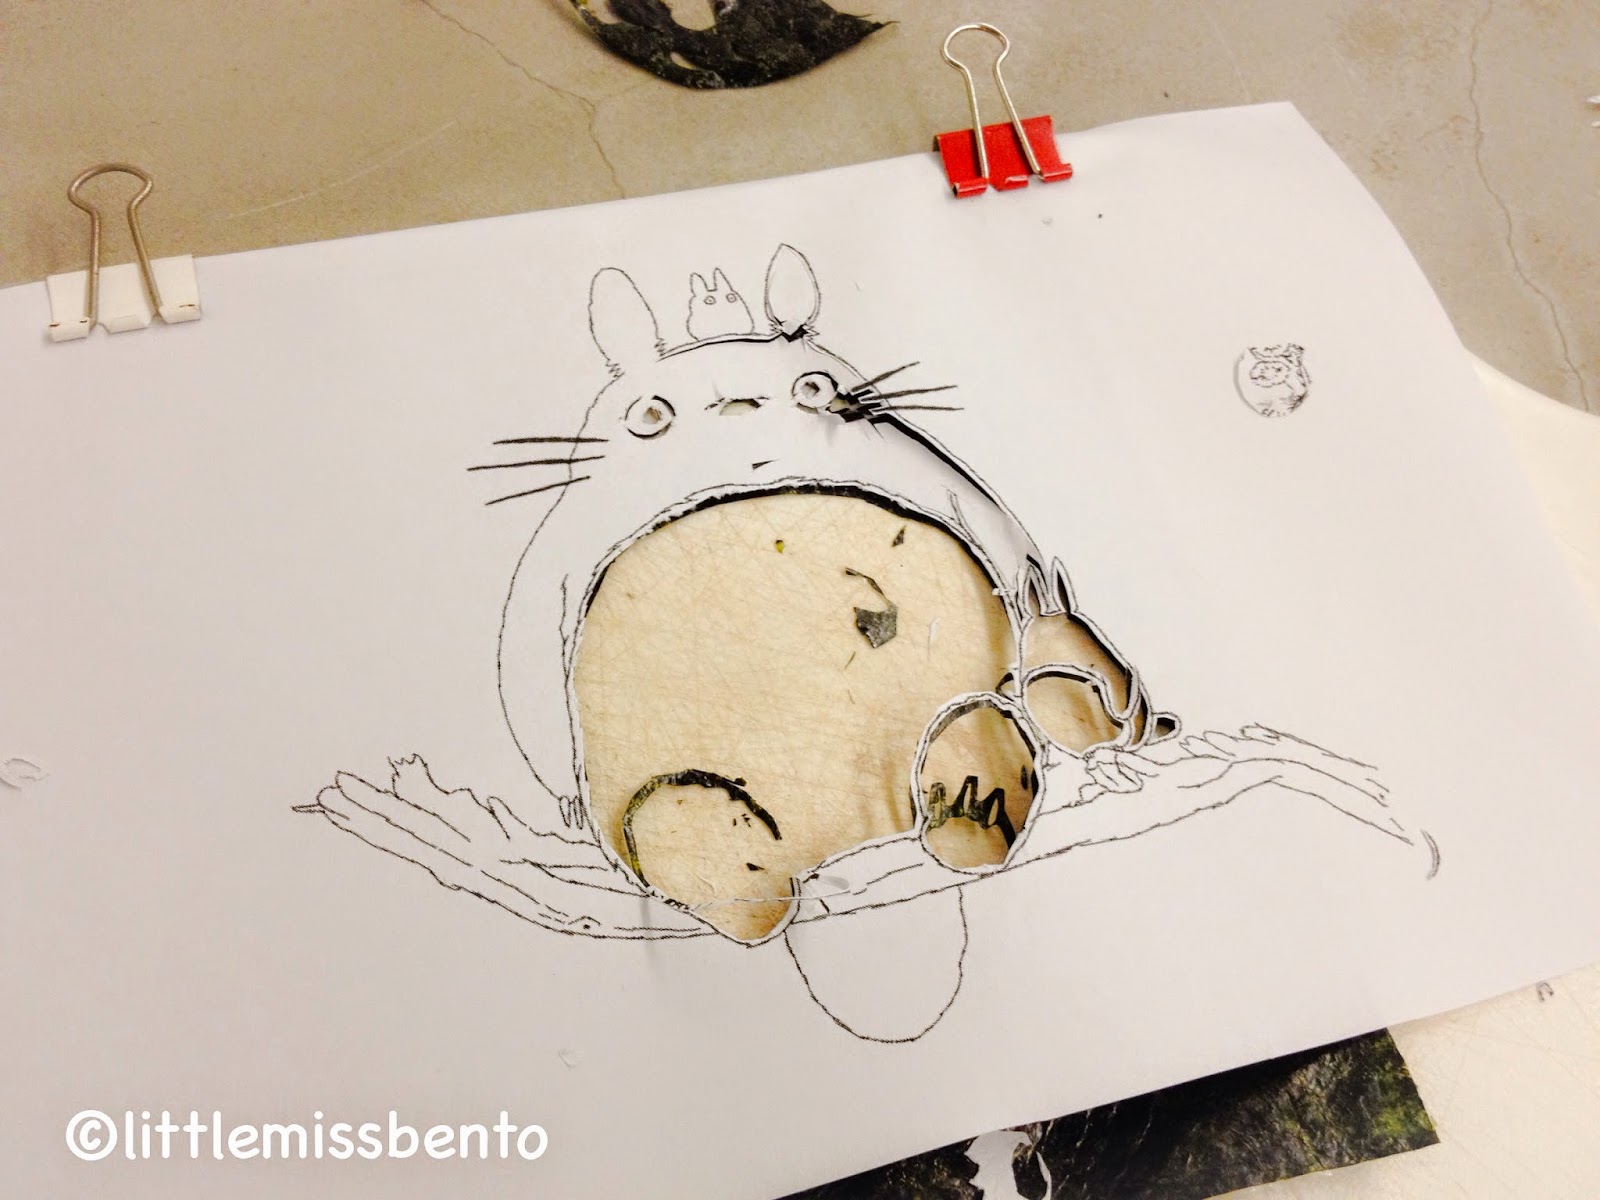
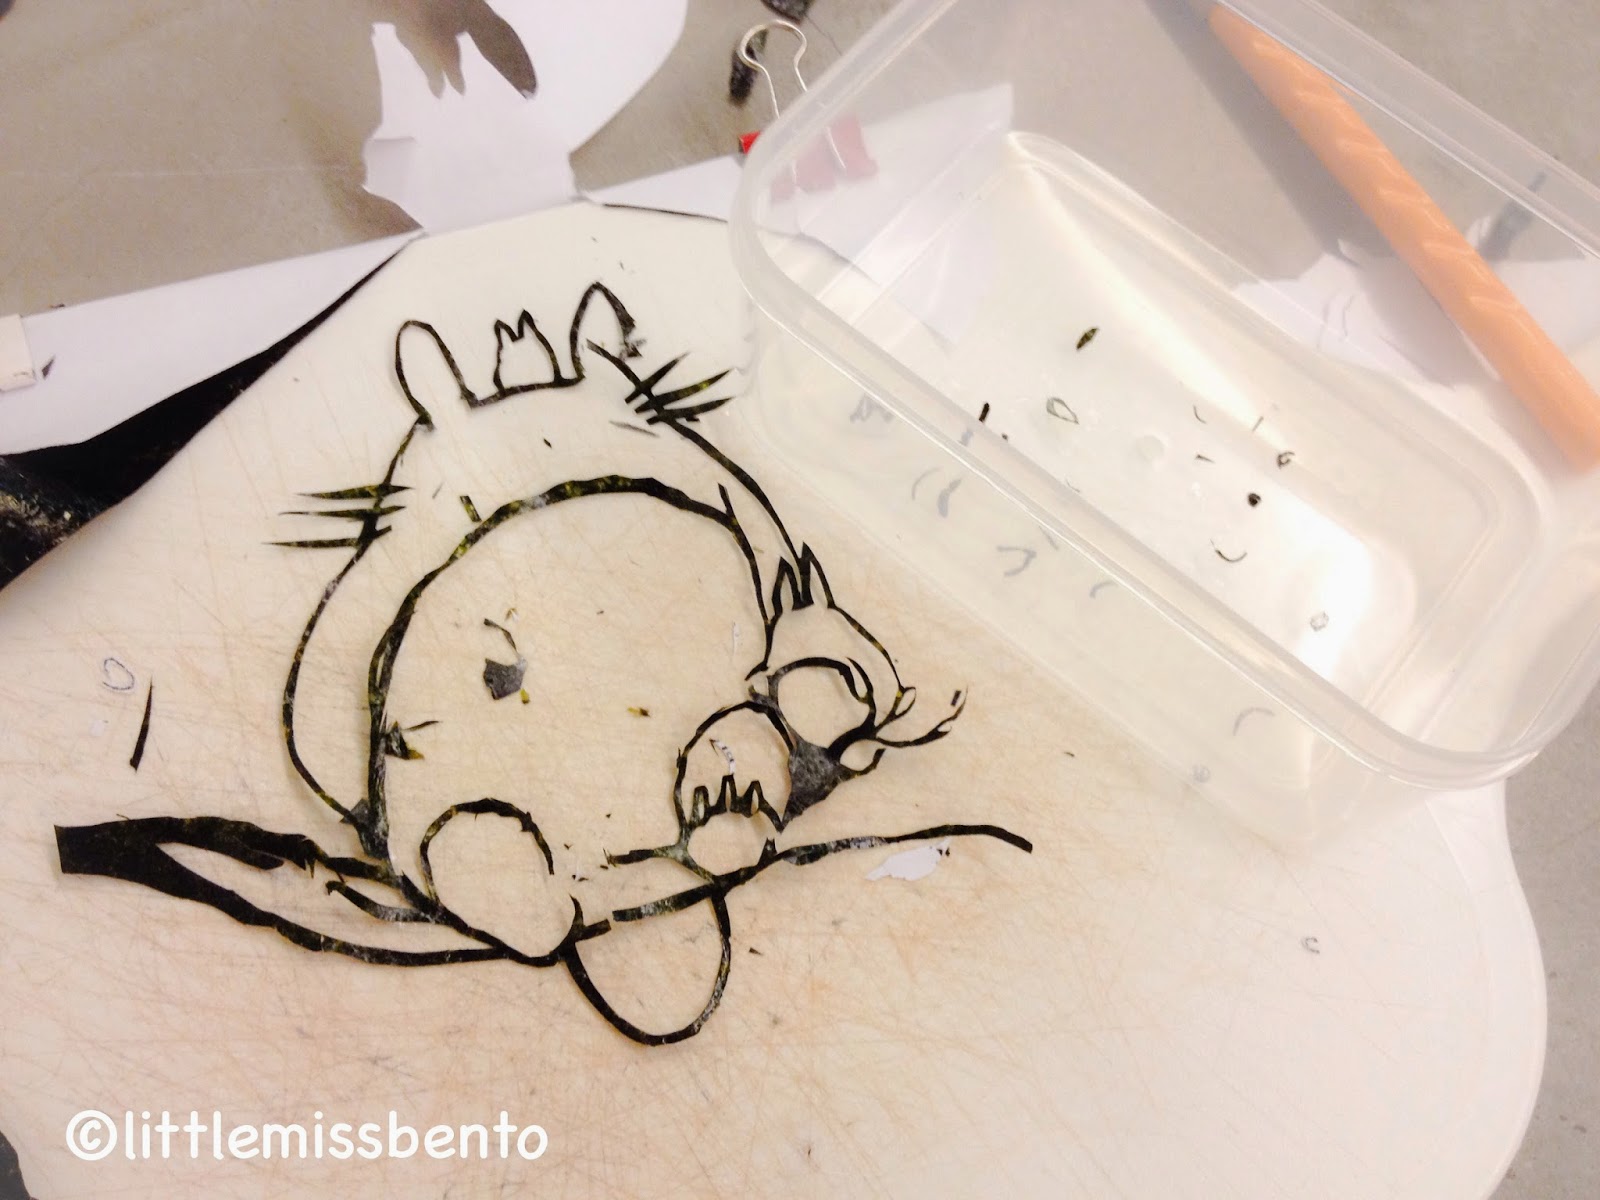
2) Cut out the smaller parts and details. Followed by the large areas. The smaller parts which are not ‘attached’ should be cut out and place in a container (so you don’t lose them!).
*Note: that as Singapore’s weather is humid, the seaweed may easily soften and curl up. You can perhaps choose to work in air con room and also cover the container holding the tiny detached parts.Â
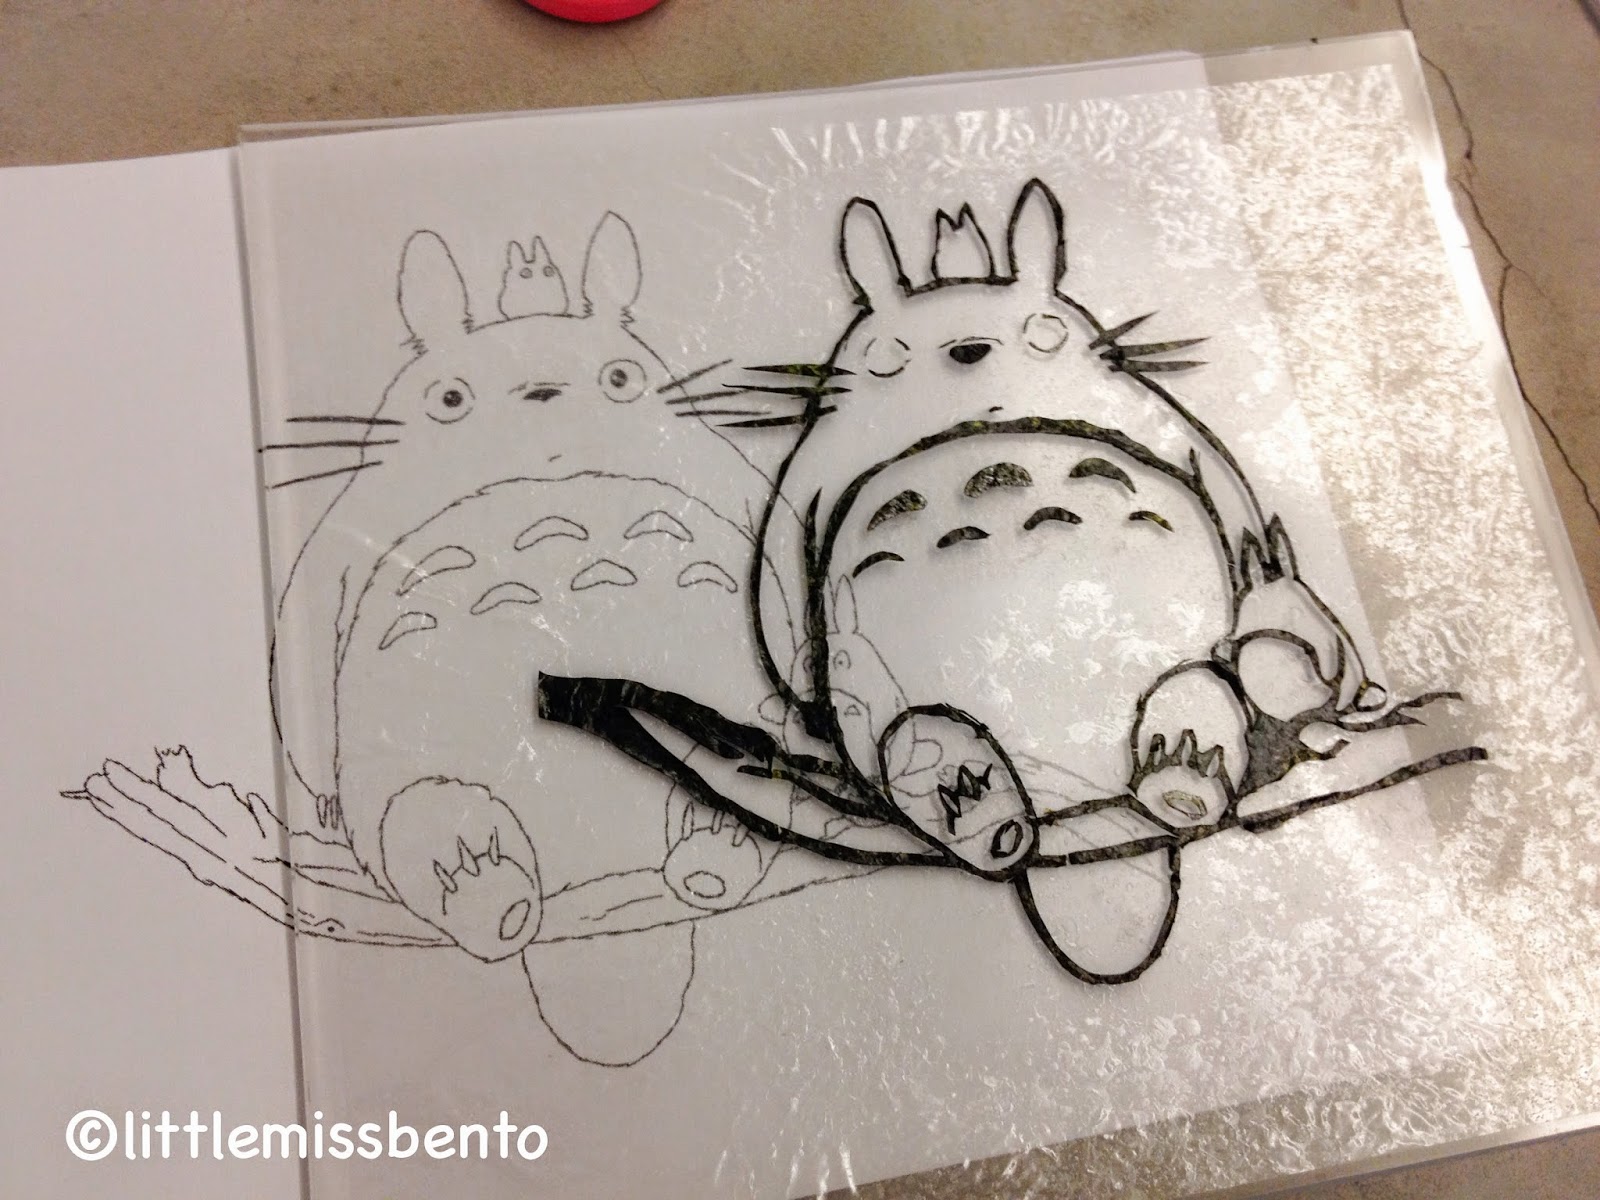
3) Lay the oblate sheet on a mat, ideally transparent mat (usually it comes in the pack when you buy them). Place the second print out design underneath to act as a guide.Â
4) Dampen your lint free cloth and wet the oblate sheet slightly. Just enough to make it sticky but not too wet as the oblate will tear or ‘melt’.Â
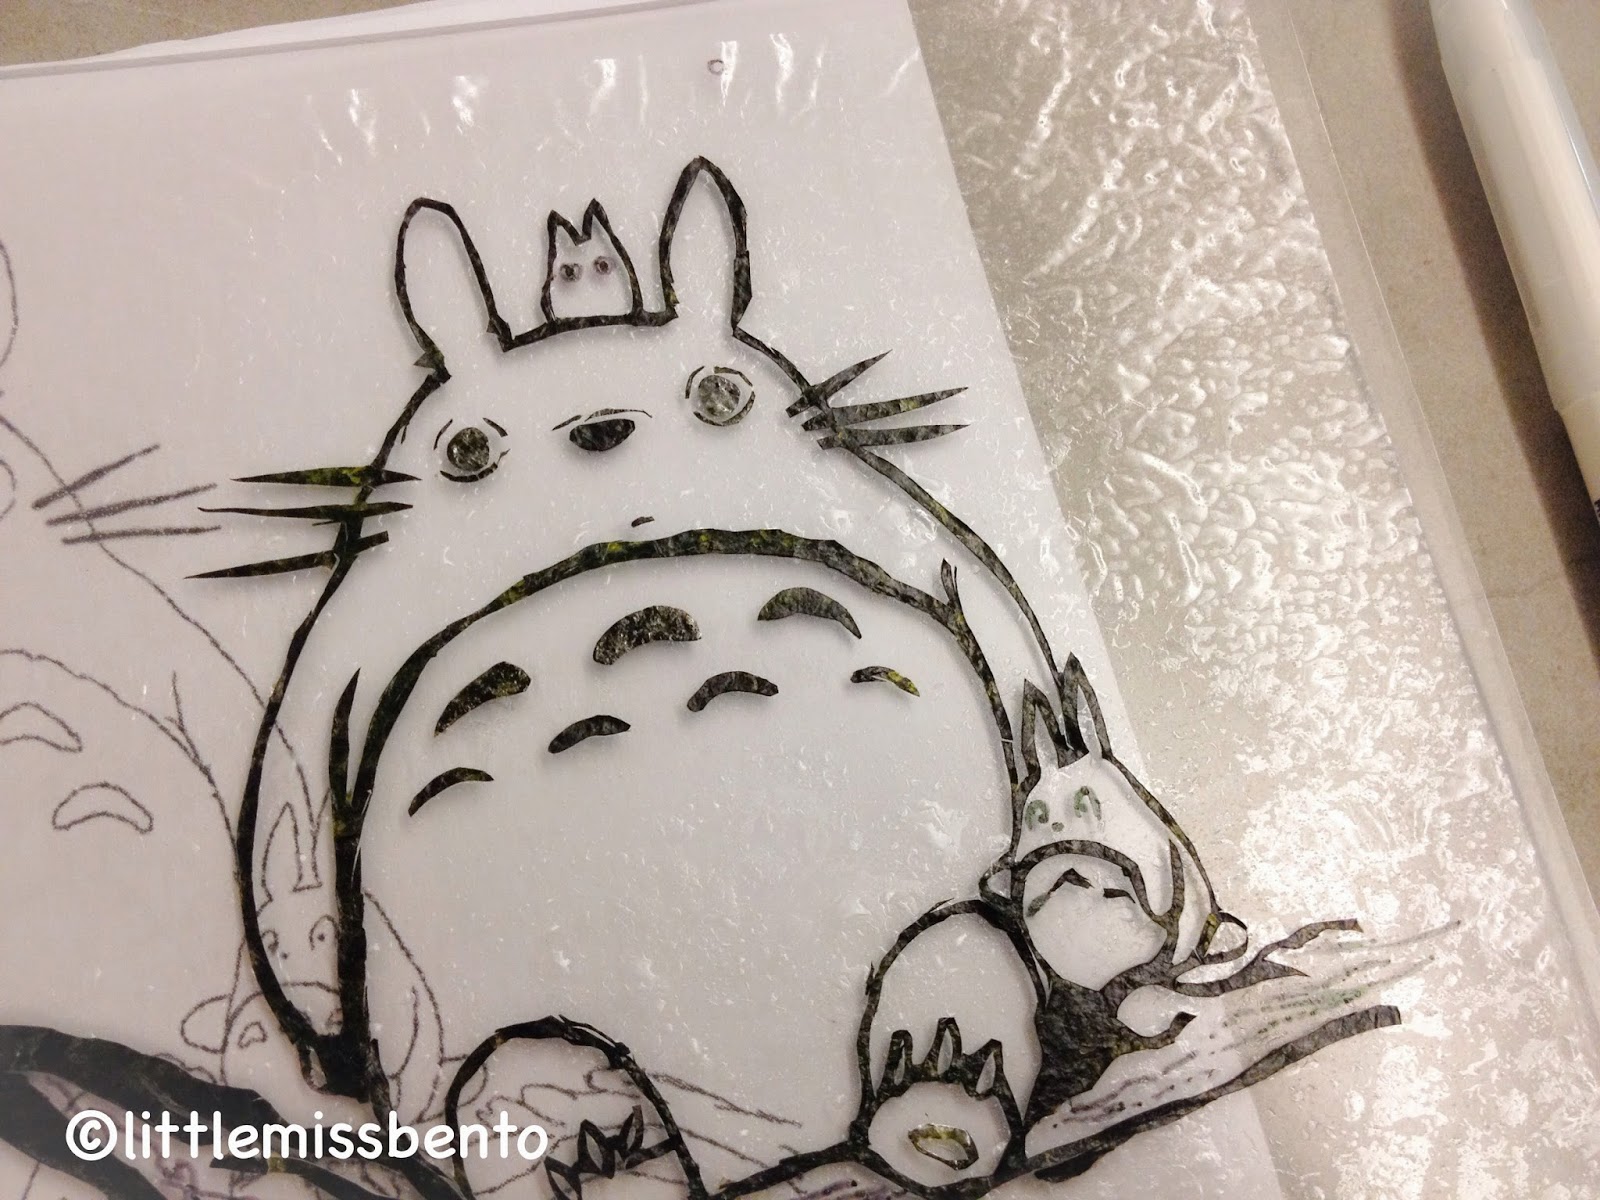
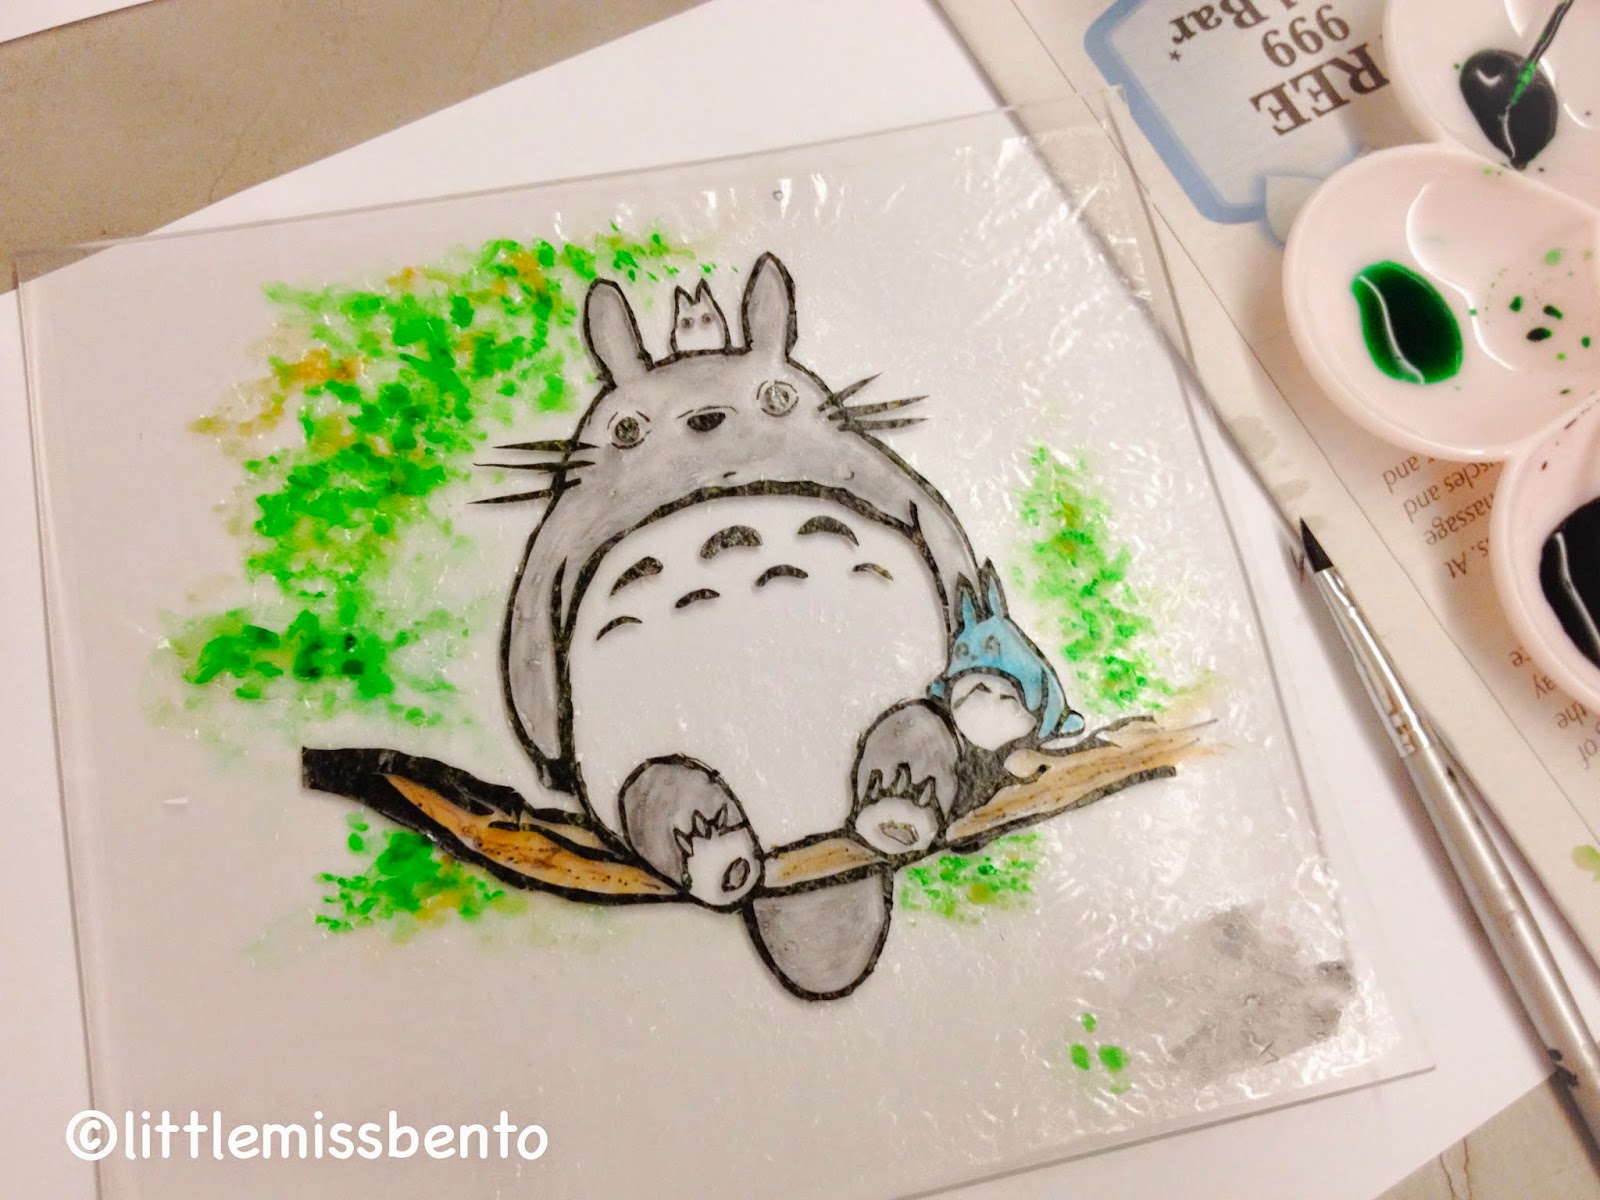
5) Slowly, lay the seaweed parts over and assemble them to form the design. Add the smaller parts and details.Â
Tip: If there are some parts that do not join well, you can use the edible black pen to fill them in. For the two smaller totoros, I drew their eyes as they were too small to cut.Â
6) Let it dry slightly (if too wet) for about 10mins. In the meatime, prepare the colors.Â
7) Dilute the icing colors with some water to achieve the desired color tones. Using a small brush, brush on the colors to the seaweed design.Â
Tip: do not rub too hard or paint too much back and forth. The oblate sheet might break or ‘melt’.Â
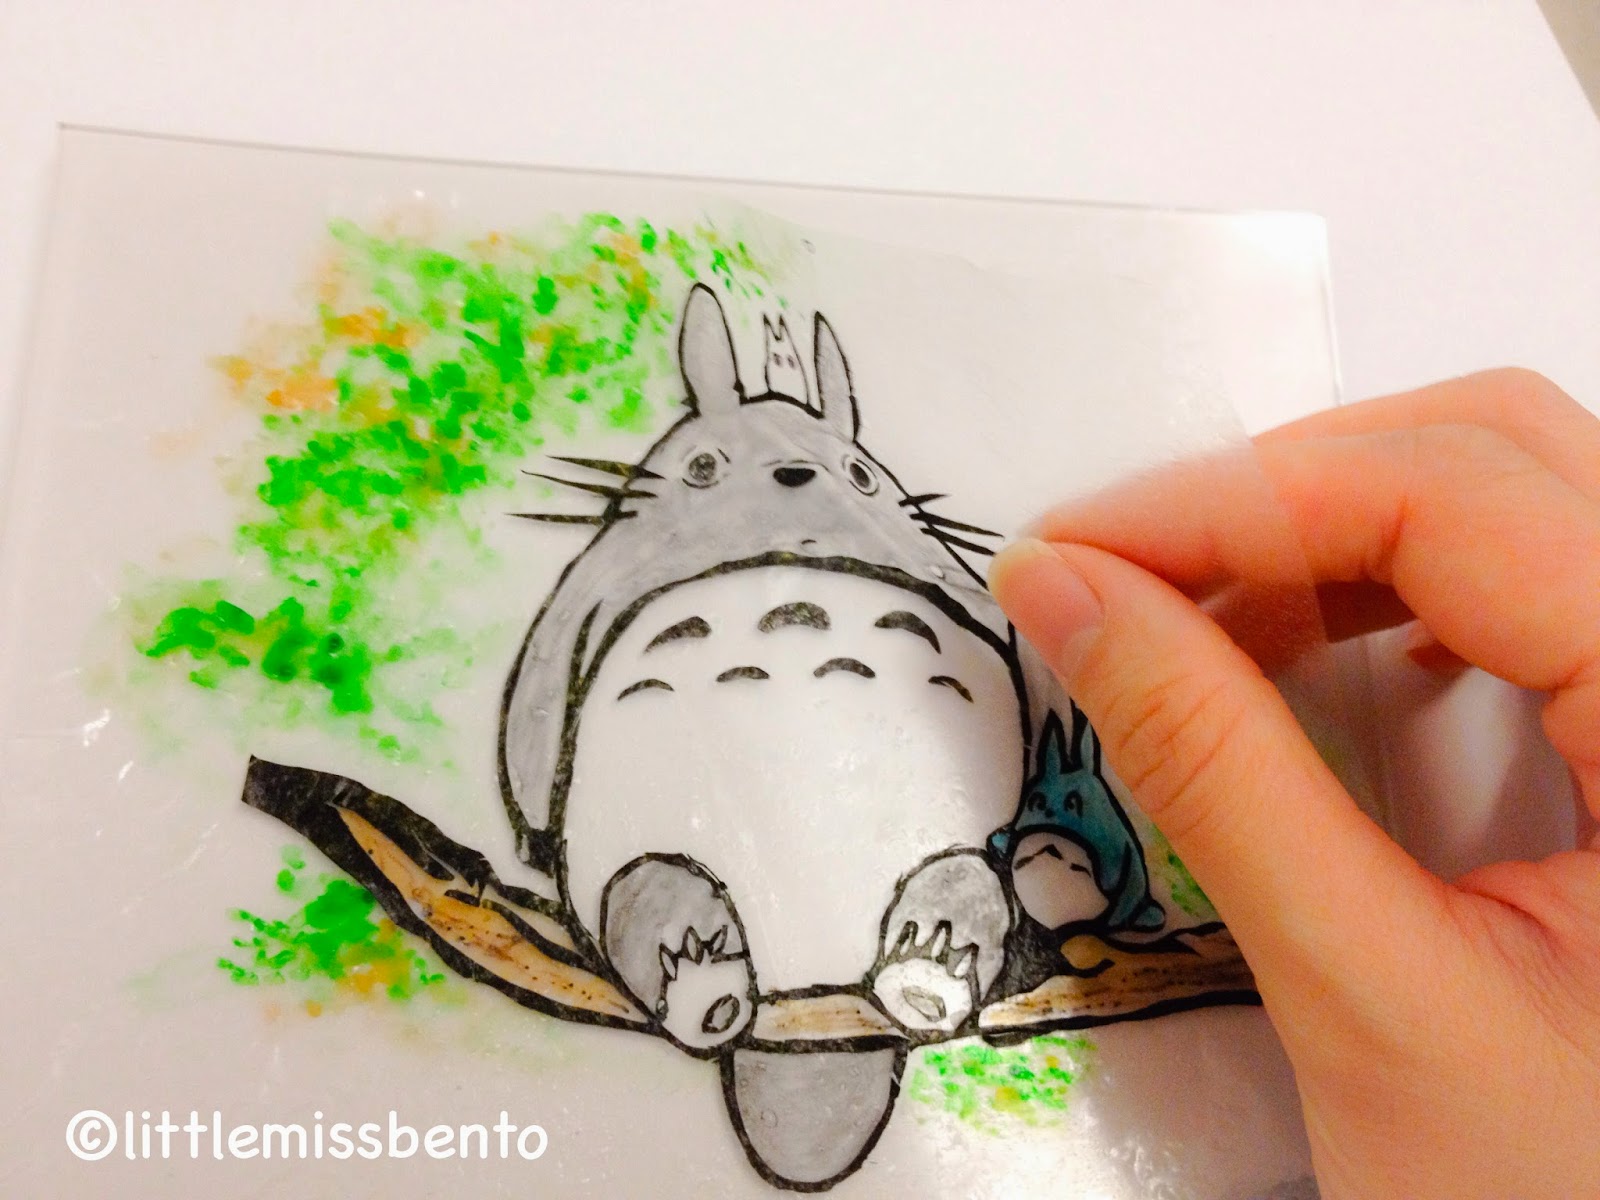
8) After completed, let it rest overnight to dry completely.
9) Following day, gently remove the sheet from the base. Trim off the excess and place it on your rice (or cheese slice) in your bento.Â


June 26, 2014
I can only find shiratama and oblate sheet tutorials in English from your site. They’re so helpful. Not only do you have an amazing blog, you respond to your comments. I really appreciate it. Thanks again!
June 27, 2014
Awww thank you! I am glad you like my tutorials and blog, please do come back again!
June 26, 2014
Will they melt? I am ordering internationalls ^^”‘
June 26, 2014
No worries, if there is no water and dry, it would not melt. :) you can ship internationally :)
June 25, 2014
Do oblate sheets need to be refrigerated? Also, I see one on Amazon for 40 microns, which are a little thicker. Do you recommend the thinner ones instead for bento?
June 26, 2014
Hi, no please do not refrigerate them. I keep them in a ziplock bag after I open the pack. it comes in a ziplock pack too, so its like double ziplock when stored. Basically you do not want to introduce water as the sheets will melt, assuming if you refrigerate and when you take them out to use, there will be condensation, that is not good for the sheets. I am using the thicker ones for the seaweed cutting ;)
June 26, 2014
Forgot to add them I recommend the thicker ones as when you add colors, the thin ones might tear.. :) Plus they are so totally tasteless that it is okay to use thicker ones too.
May 4, 2014
Thank you so much for all the tutorials! Would you be able to make a video one day?
May 5, 2014
My pleasure! Glad u like the tutorials, I do hope that I can make videos to share in future!
May 1, 2014
Lovely Totoro nori cutting, love the colours you used! I just ordered the oblate sheets using the link provided, can’t wait to try it out!
May 1, 2014
awesome! Have fun with it! :)
May 27, 2014
Sorry, couldn’t find the link to get the oblate sheets. Is it broken?
May 27, 2014
Nope, it shows on my browser in the post. But here is the link: http://www.amazon.co.jp/dp/B00DPTMR68/ref=as_sl_pc_tf_lc?tag=littlemissb07-22&camp=243&creative=1615&linkCode=as1&creativeASIN=B00DPTMR68&adid=10KH5QH5GG1ZH6PDR3QN&&ref-refURL=http%3A%2F%2Flittlemissonigiri.blogspot.sg%2F2014%2F04%2Ftotoro-seaweed-cutting-bento.html%3FshowComment%3D1401177195678
May 28, 2014
Thank you so much!
April 30, 2014
Amazing food art! and thanks for the useful step by step guides… :0
May 1, 2014
Thank you! glad u like the step by step guide! :D